Controller Mapping
PowerAim’s controller-mapping engine lets you remap keyboard/mouse → virtual Xbox controller, gamepad → keyboard+mouse, or both at once. It’s a reWASD-style engine: profiles, per-mapping activators (press / long-press / double-tap / toggle / pulse), stick deadzone + anti-deadzone + response curve, modifier (shift-layer) gates, and process-scoped auto-activation.
Use it to play gamepad-only games with KB+M, KB-only games with a controller, or to build hybrid bindings you can flip with a hotkey mid-match.
Prerequisites
- ViGEmBus must be installed for any direction that writes to the virtual gamepad (KB+M → Pad). See Installation.
- HidHide is optional but recommended when your physical controller is plugged in — see Hidden Controllers.
Core concepts
Profile
A profile is a named bundle of mappings + stick-tuning parameters. Only one profile is active at a time (the first enabled profile whose MatchProcess matches the focused window). PowerAim ships several presets out of the box — see Built-in presets.
Mapping
A single rule that says “when source X happens, fire target Y.”
| Kind | Source examples | Target examples |
|---|---|---|
| Keyboard key | W, Space, LShift |
(used as source) |
| Mouse button | Left, Right, Middle |
(used as source or target) |
| Gamepad button | A, B, X, Y, LB, RB, LT-thumb, Start |
(used as source or target) |
| Gamepad trigger | LT, RT (analog slider) |
analog stick deflection target |
| Gamepad stick direction | LeftStickUp/Down/Left/Right, RightStickUp/... |
discrete direction (digital) |
Each mapping also has:
- Enabled — per-mapping switch
- Activator — press style (see below)
- LongPressMs — duration for long-press or pulse
- Modifier — optional second source that must be held for the mapping to fire (shift-layer / “LB+A → Y” patterns)
Direction
Independent of profile contents, the user toggles which “side” should drive at runtime. The engine reads:
- Both — every mapping fires
- KB → Pad — only KB/M → Pad mappings fire
- Pad → KB — only Pad → KB/M mappings fire
A single profile with both directions lets you flip without re-editing.
Activators
The activator picks when the target fires relative to the source:
| Activator | Fires when |
|---|---|
| Press (default) | Target held while source is held; released when source releases |
| LongPress | Target fires only after source has been held for LongPressMs ms |
| DoubleTap | Target fires on a second press within ~300 ms |
| Toggle | Each press flips the target on/off (latching) |
| Pulse | Target presses for LongPressMs ms on each source press, then auto-releases |
Mix these in a single profile — one button can drive multiple mappings with different timings (e.g. A = Jump on Press, A = Crouch on LongPress 300 ms).
Modifier (shift-layer)
Each mapping can have an optional Modifier — a second source that must be held for the mapping to fire. Example:
A → Y (no modifier)— A drives Y normallyLB + A → B (modifier: LB)— but while LB is held, A drives B instead
This is the canonical “shift layer” pattern from reWASD / Steam Input.
How to enable
- Mapping in the sidebar
- Toggle Active at the top. (The Active toggle has its own hotkey support — see Keybinds & Hotkeys.)
- Pick a direction: Both / KB→Pad / Pad→KB
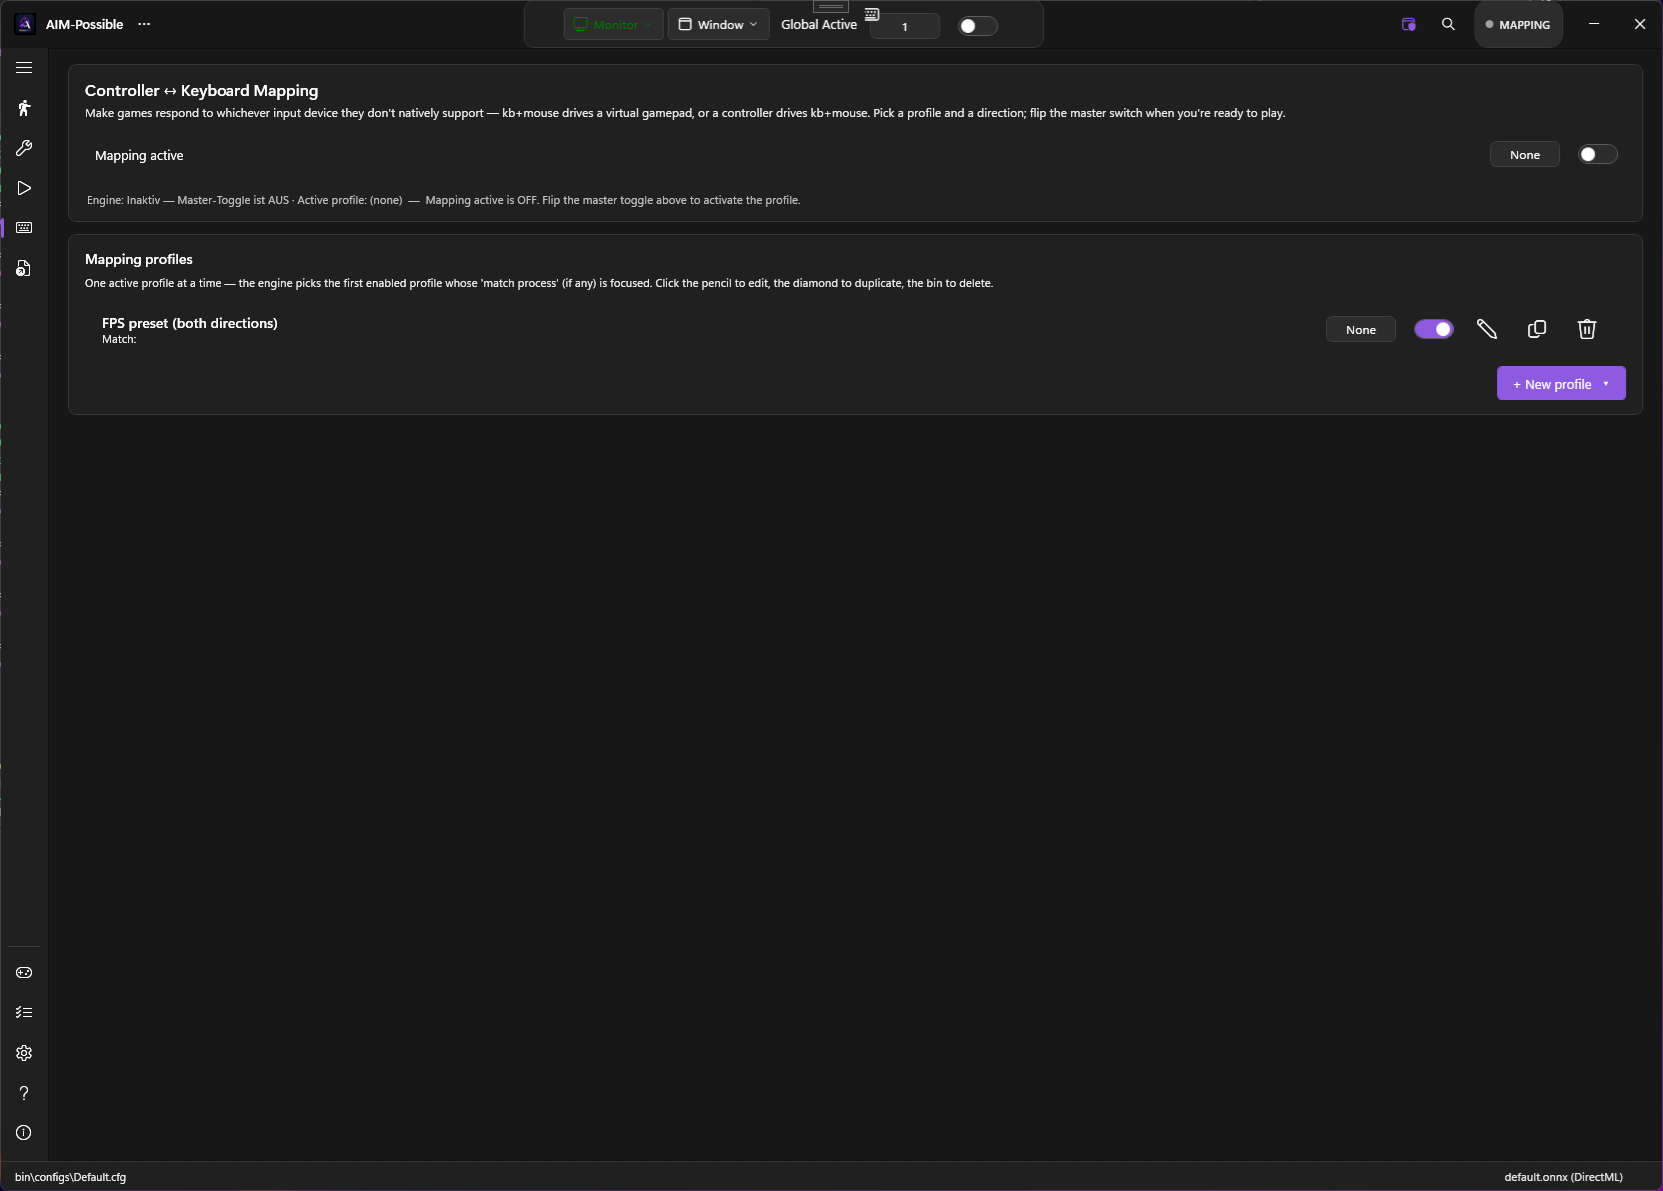
- Pick a profile from the list. Click + FPS preset for one of the built-in starter profiles, or + New profile for an empty one.
- Click Edit to open the per-profile editor.
The status line at the bottom of the Mapping page shows the engine state: Engine: Idle / Engine: Running (profile name).
The profile editor
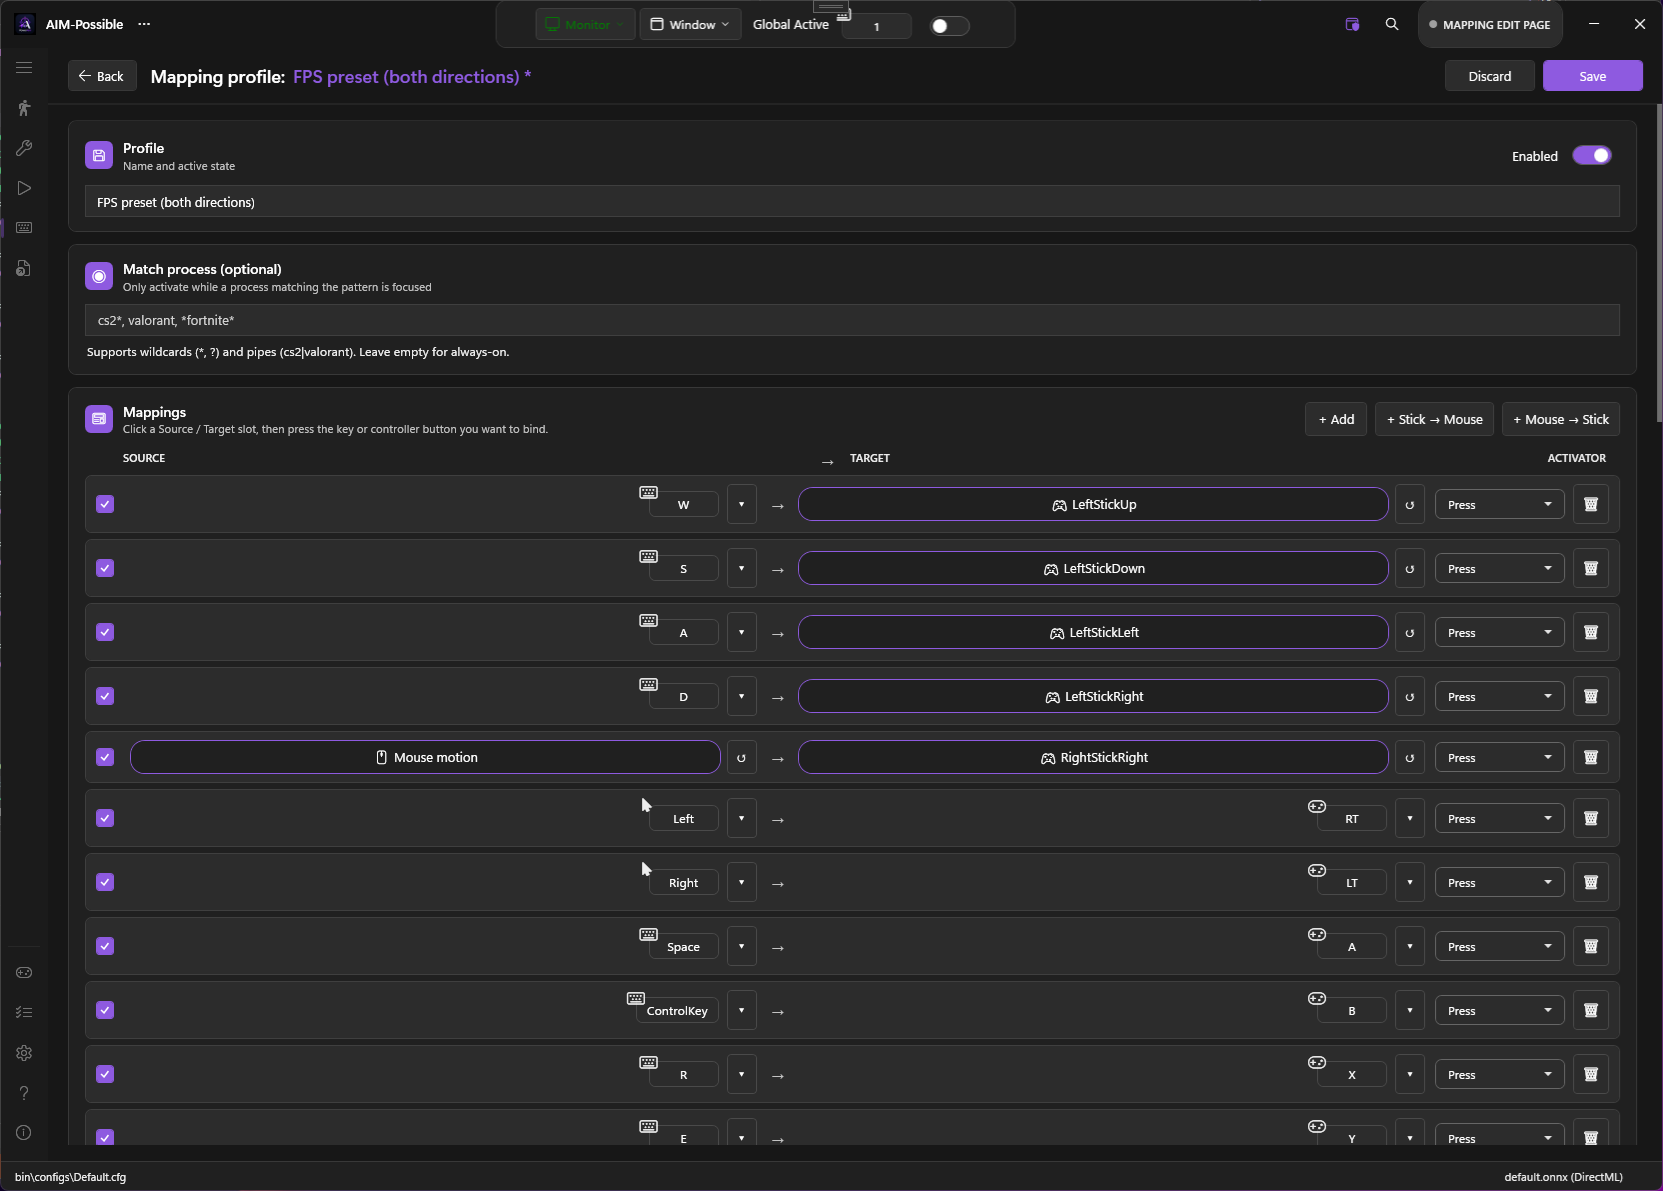
The editor has three main areas:
1. Profile-level settings
| Setting | What it does | Default |
|---|---|---|
| Name | Display name | “Profile” |
| Enabled | Master switch (must be on for engine to consider this profile) | Off |
| Match Process | Wildcard pattern (e.g. cs2|valorant). Empty = always-on. |
empty |
| Stick-to-Mouse Sensitivity | Pixels per tick at full stick deflection (Pad → mouse motion) | 12.0 |
| Mouse-to-Stick Sensitivity | Scale for synthesizing right-stick from mouse delta | 1.0 |
| Stick Deadzone | Below this fraction of full deflection, stick = centred (0.0–0.5) | 0.15 |
| Stick Anti-Deadzone | Minimum output as soon as the stick leaves the deadzone (0.0–0.5) | 0.0 |
| Stick Response Curve | Exponent applied to stick magnitude; ≥1.0 = slow center, fast edge | 1.0 |
| Stick Mouse Exponent | Same idea, dedicated to stick→mouse motion | 1.4 |
| Invert Mouse Y | Inverts Y when feeding right stick into mouse motion (or vice versa) | Off |
2. Mapping list
A table of all mappings in the profile. Each row:
- Source chip — click to re-bind. The chip enters “press a key/button now” mode and listens for the next input.
- Target chip — same, but for the target.
- Activator dropdown — Press / LongPress / DoubleTap / Toggle / Pulse
- LongPressMs spinner — visible when activator needs it
- Modifier chip — optional. Click to bind a second source.
- Enabled checkbox + Delete button
3. Special targets (the “Special…” dropdown)
When binding a source chip, you can also pick from a “Special” dropdown:
- Stick directions (
LeftStickUp,LeftStickDown, …,RightStickRight) — digital direction signals - Mouse motion sentinel — special target meaning “feed mouse delta into the right stick” (KB→Pad direction) or “feed right stick into mouse motion” (Pad→KB direction)
The mouse-motion sentinel is what makes the right-stick / mouse-look mapping work — a single mapping enables the entire pump.
Recording a mapping
The visual workflow:
- Click an empty source slot → it enters “listening” mode (chip says “Press a key…”)
- Press the key, mouse button, or gamepad button on your real hardware
- The chip captures the input and shows its name
- Click the target slot
- Press the key/button you want to synthesize
- (Optional) Pick an activator, set the long-press duration, bind a modifier
- Click Save to commit
For stick directions / mouse motion, use the Special… dropdown instead of pressing a key.
Built-in presets
Available via the ”+ FPS preset” / “+ Driving preset” / … buttons on the profile list.
FPS — KB → Pad
The canonical FPS keyboard-to-virtual-controller binding. WASD → left stick, mouse → right stick, LMB → RT, RMB → LT, Space → A, etc. Play console-only games with KB+M.
FPS — Pad → KB
Reverse direction. Left stick → WASD, right stick → mouse motion, RT → LMB, LT → RMB, A → Space, etc. Play KB-only games with a controller.
FPS — Both
The two presets above combined into one profile. The runtime direction picker (Both / KB→Pad / Pad→KB) decides which side actually fires.
Driving — KB → Pad
A/D → left stick steering, W/S → triggers, Space → handbrake (A), LShift → up-shift (RB), Ctrl → down-shift (LB), etc. For arcade racers that gate KB+M players.
Controller as Mouse
Right-stick → OS cursor motion, RT → LMB, LT → RMB, face buttons → Enter / Esc / Tab / Backspace, D-Pad → arrow keys, Start → Apps key. For couch use, accessibility, or grinding through menus without a keyboard.
Stick tuning
The five stick-related sliders give you a reWASD-grade feel curve:
- Deadzone — your stick’s resting wobble. Raise it to silence drift; lower for max sensitivity.
- Anti-Deadzone — many games have their own deadzones that swallow small inputs. Anti-deadzone snaps the output to a minimum value the moment the stick leaves your deadzone, so the game sees motion immediately.
- Response Curve — exponent on magnitude.
1.0= linear;1.4= slow at center, fast at edge (good for fine aim);2.0= aggressive curve. - Stick Mouse Exponent — same idea, applied only to stick→mouse motion. Lets you tune mouse feel without affecting other mappings.
- Invert Mouse Y — for “flight stick” Y-axis preference.
Tuning workflow:
- Set Deadzone to 0.10 (or higher if your stick has drift).
- Bump Anti-Deadzone to 0.10 — most games feel “twitchier” with this on.
- Set Response Curve to 1.4 for general use, 1.8 for sniper aim.
- Use the Gamepad Tester to verify the output.
Gamepad tester
The Gamepad Tester is a live visualization of both the physical controller (what your hardware says) and the virtual controller (what PowerAim is sending). It’s the fastest way to confirm a mapping fires correctly.
Open it from:
- Gamepad settings → Open Gamepad Tester button
- Mapping page → Open Tester (pops out as a separate window so you can keep editing)
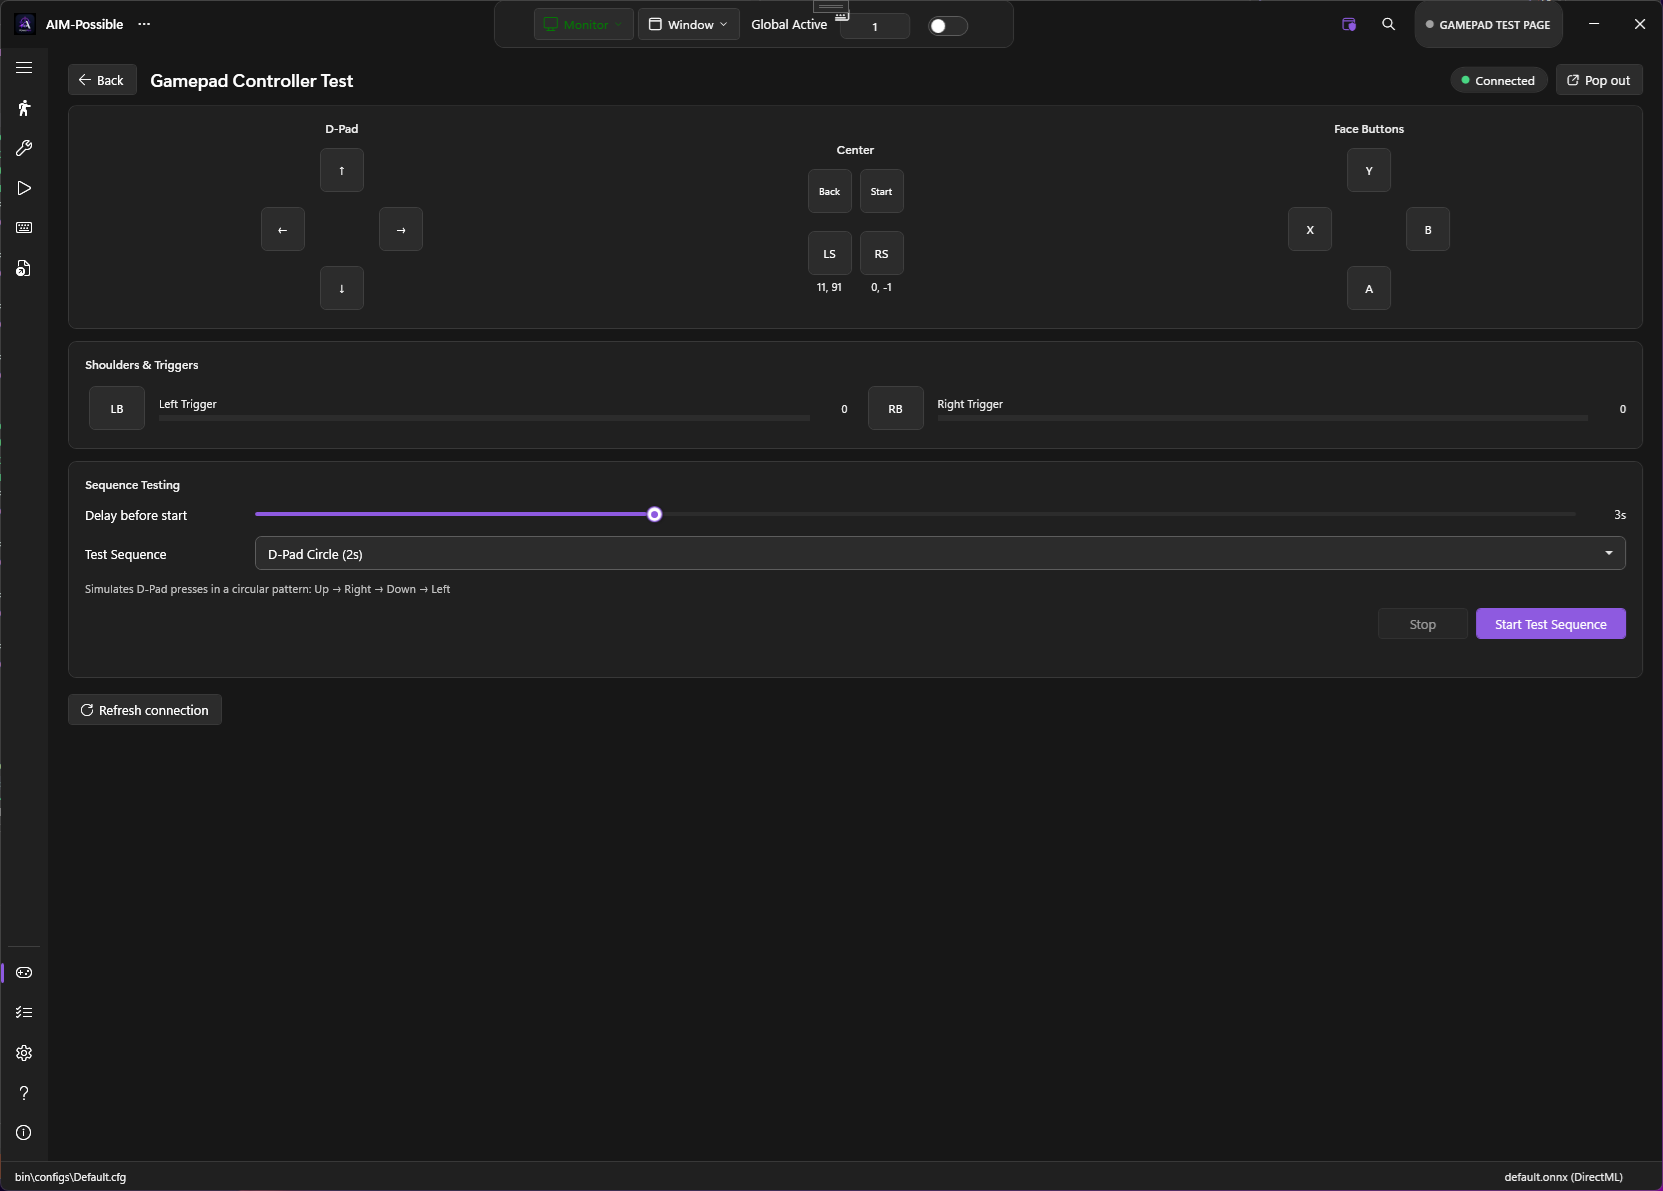
The tester floats above other windows so you can leave it open while editing mappings.
Tips
- Build profiles around games, not bindings. “Apex Legends” with one profile, “Forza Horizon 5” with another. Use
MatchProcessto auto-switch. - Toggle and Pulse are underused. A toggle on a crouch button is much friendlier than a held-crouch.
- The Modifier slot is the killer feature. Bind
LB + A → Grenadewhile keepingA → Jumpas the default — same button does two things. - Mouse-look sensitivity tuning is two sliders.
MouseToStickSensitivitycontrols how much mouse motion equals stick deflection (KB → Pad);StickToMouseSensitivityis the reverse (Pad → KB). - The engine hot-reloads. Edit a profile and watch the status line — changes apply immediately, no restart.
Troubleshooting
- Mappings don’t fire — check the Active toggle, the profile’s Enabled state, and the Match Process pattern (if set, the foreground window must match).
- KB → Pad direction does nothing in-game — the game probably can’t see the virtual controller. Install HidHide and cloak your physical pad so the game only sees the virtual one.
- Stick feels mushy / unresponsive — bump Anti-Deadzone (0.10–0.15) and/or Response Curve (1.2–1.4).
- Pulse keys don’t release — verify
LongPressMsisn’t set to 0; that’s a no-op. - Modifier mapping fires both with and without modifier — make sure you set
ModifierKind(notNone). The modifier slot is empty by default. - Tester shows my buttons but game ignores them — see Gamepad Not Detected.