Your First Aim
A 5-minute quick win: launch PowerAim, pick a model, and see the crosshair track a target.
This guide assumes you have already installed PowerAim.
1. Launch PowerAim
Start PowerAim.exe. The main window opens with a sidebar on the left and an empty content area — there is no model loaded yet, so most cards are hidden.
2. Load a model
Click Models & Configs in the sidebar. PowerAim ships several models in bin\models\ and shows more in the Downloadable Models strip.
Click any model file (e.g. Universal.onnx). When loading completes you’ll see:
- The model’s name appears in the bottom status bar
- The Aim Tools sidebar entry becomes the obvious next stop
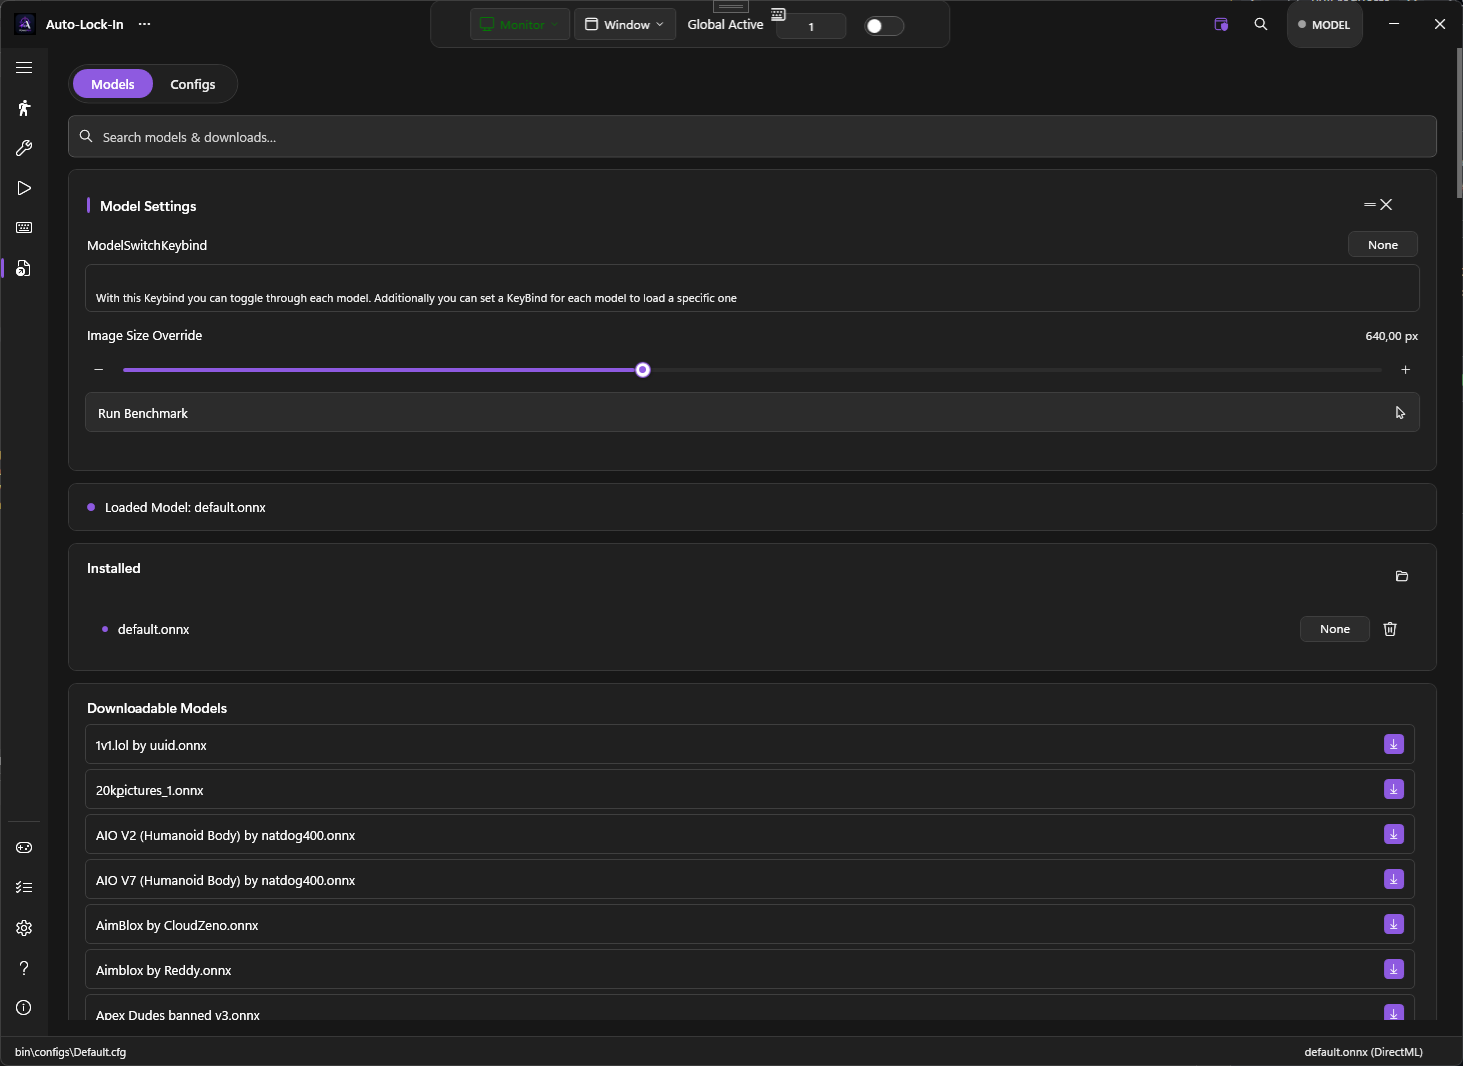
The bundled Universal models are good starting points — they’re trained on a broad mix of FPS games. For a specific game, check the downloadable list for a game-specific model.
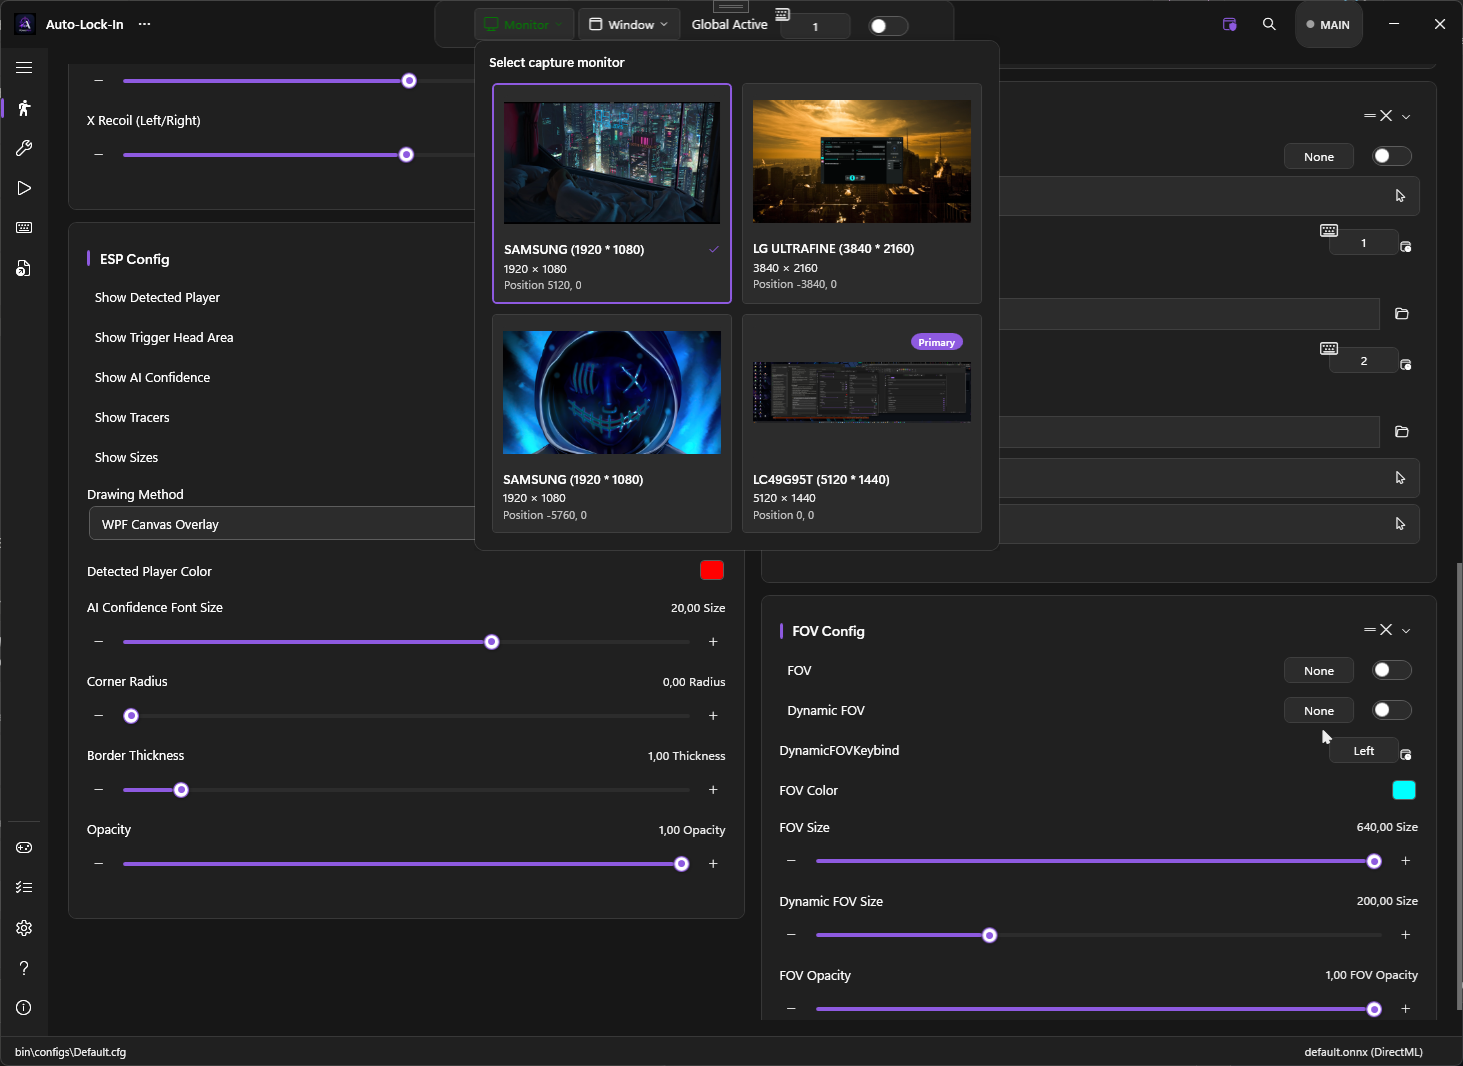
3. Verify the capture source
Center of the title bar shows the current capture target — by default that’s your main monitor. Click the monitor selector if you have multiple displays or want to capture a specific window.
4. Pick the aim key
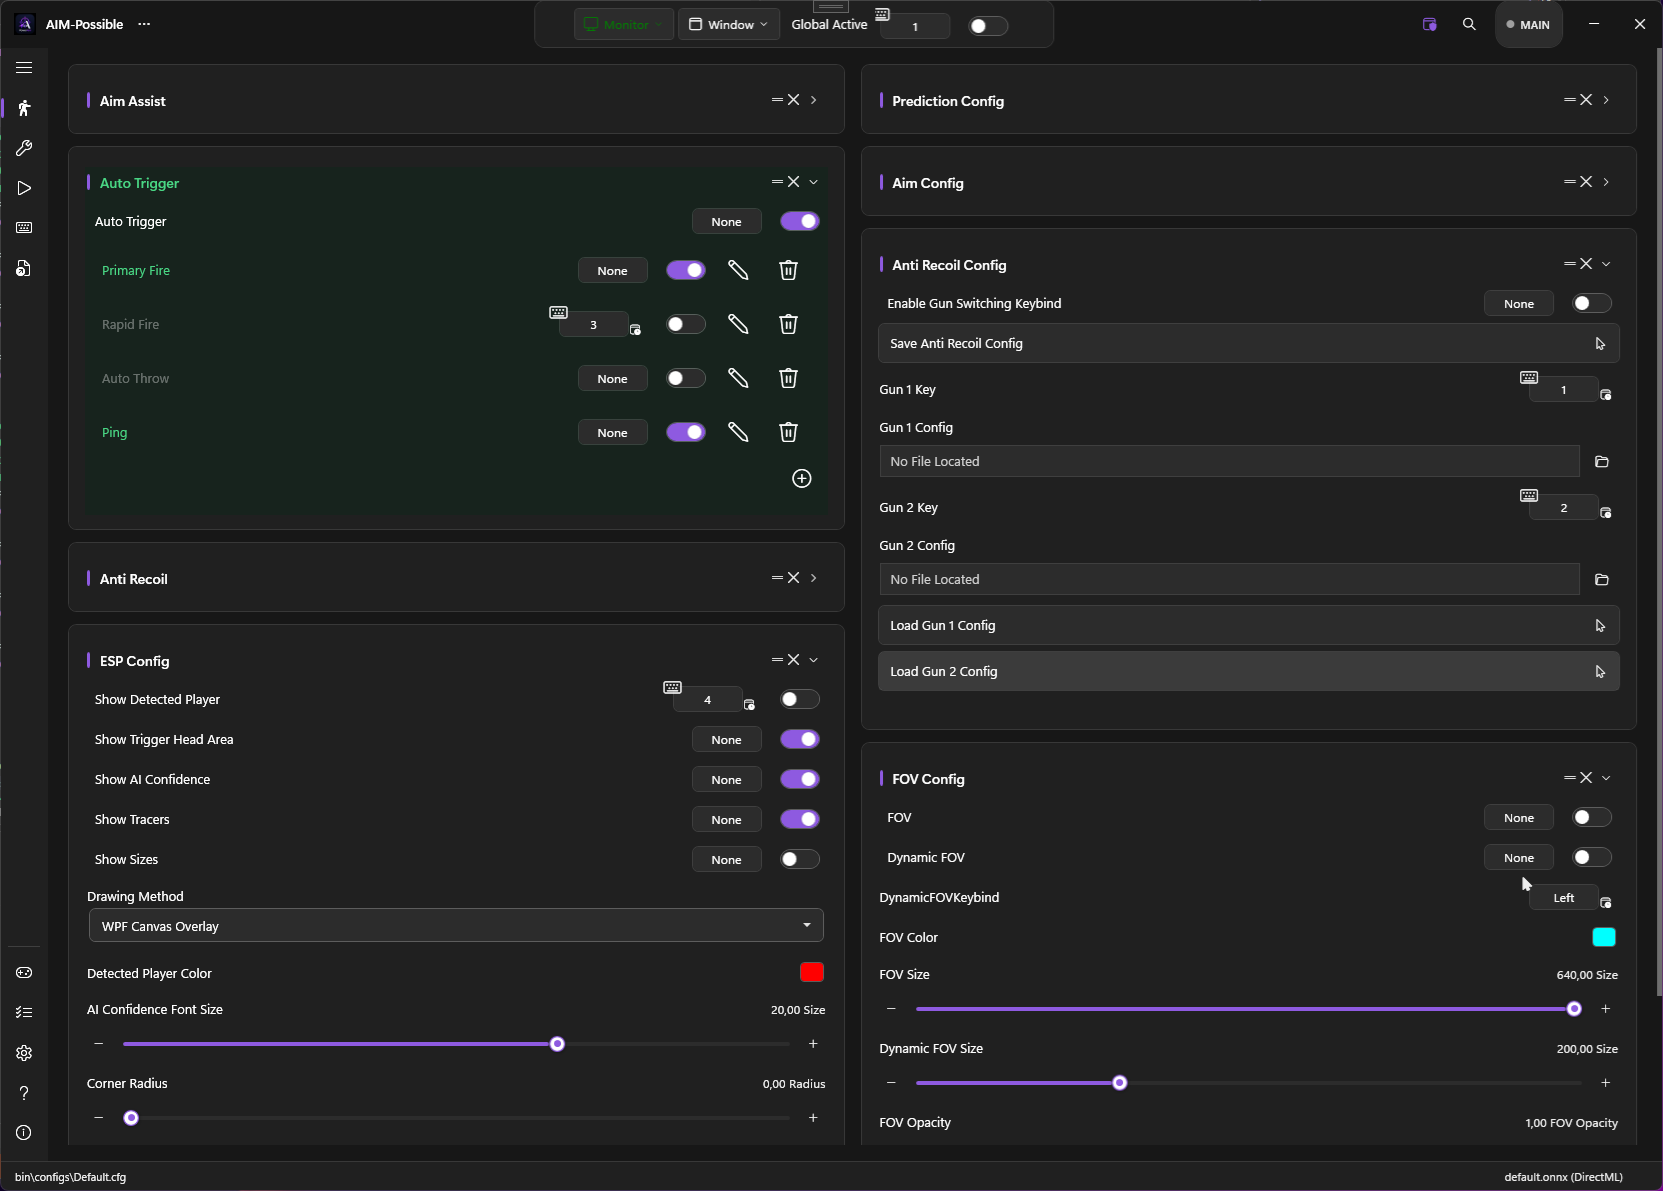
Click Aim Tools in the sidebar. The first card, Aim Assist, contains:
- A master toggle (“Aim Assist”)
- Aim Key Bindings — keys that arm the aim while held
- Toggles for Prediction and EMA Smoothening
By default, the aim key is Right Mouse Button + Left Alt. To change it, click the key chip and press the new key/button.
5. Enable Global Active
At the top of the window is the master toggle, called Global Active. Until that’s on, PowerAim does nothing — the AI loop runs but it never moves the mouse.
Toggle it on. The window picks up an accent-color glow to indicate “live.”
6. Try it in-game
Alt-tab to your game. Hold the aim key — PowerAim should start nudging your crosshair toward the closest detected target inside the FOV circle.
If nothing happens:
- Make sure the Aim Assist card toggle is on (not just Global Active)
- Make sure the model recognizes whatever the game shows on screen — enable Show Detected Player in the ESPConfig card to see live detections
- Check the Troubleshooting section if you still see nothing
What next?
Once it works:
- Calibrate your sensitivity — the wizard auto-tunes PowerAim’s
MouseSensitivityslider to match your in-game sens. - Tweak the AimConfig — Y/X offset (head vs. body), EMA smoothening, the movement path curve.
- Set up a trigger — auto-fire when the crosshair sits on the head area.
- Run the benchmark — Models tab → “Run Benchmark” picks the best model resolution for your hardware.
- Enable per-game profiles — PowerAim auto-switches the trigger / mapping profile when you alt-tab to a different game.
The full configuration story is on the Configuration overview page.