Triggers (AutoTrigger)
PowerAim’s trigger system is a complete rewrite of the original Aimmy autotrigger. Each profile holds an arbitrary number of independent triggers — each with its own keys, actions, intersection checks, and timing.
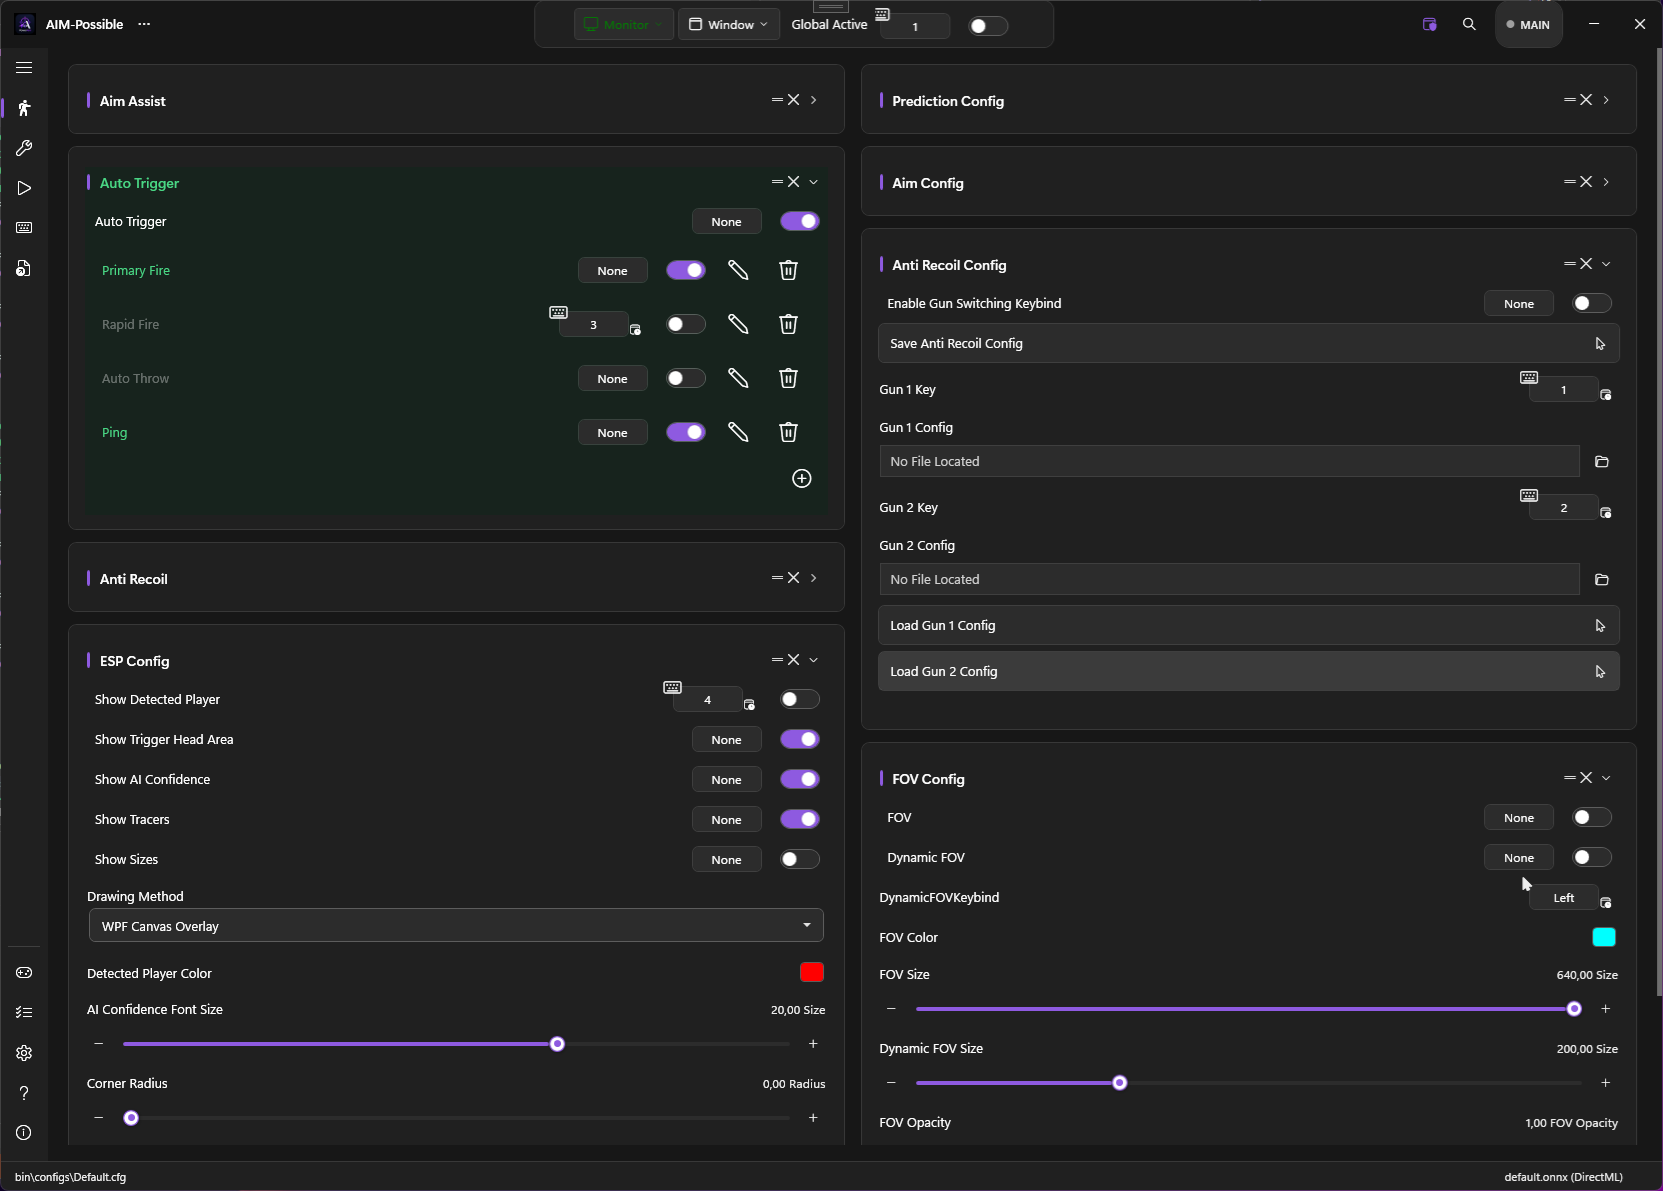
What it does
While AutoTrigger is on, each defined trigger watches its keys + intersection rules and fires its configured actions when both are satisfied.
Use cases:
- Auto-fire when the crosshair sits inside the head area (
HeadIntersectingCenter) - Auto-throw a grenade after holding G for half a second (Delay + Action)
- Pre-aim with charge mode: hold the trigger, release when the head enters the kill zone
- Fire only while
LMB AND Shiftare both held, but never whileRorTabare held (anti-trigger)
How to enable
- Aim Tools → AutoTrigger → toggle on
- The trigger list shows your current triggers. Each row has:
- Name + active state
- Quick description (keys + actions + intersection)
- Toggle, Edit, Delete buttons
- Click + New Trigger at the bottom to create one, or Edit to open the full editor.
The trigger editor
The trigger editor is the heart of the system. Open it via Edit on any trigger row.
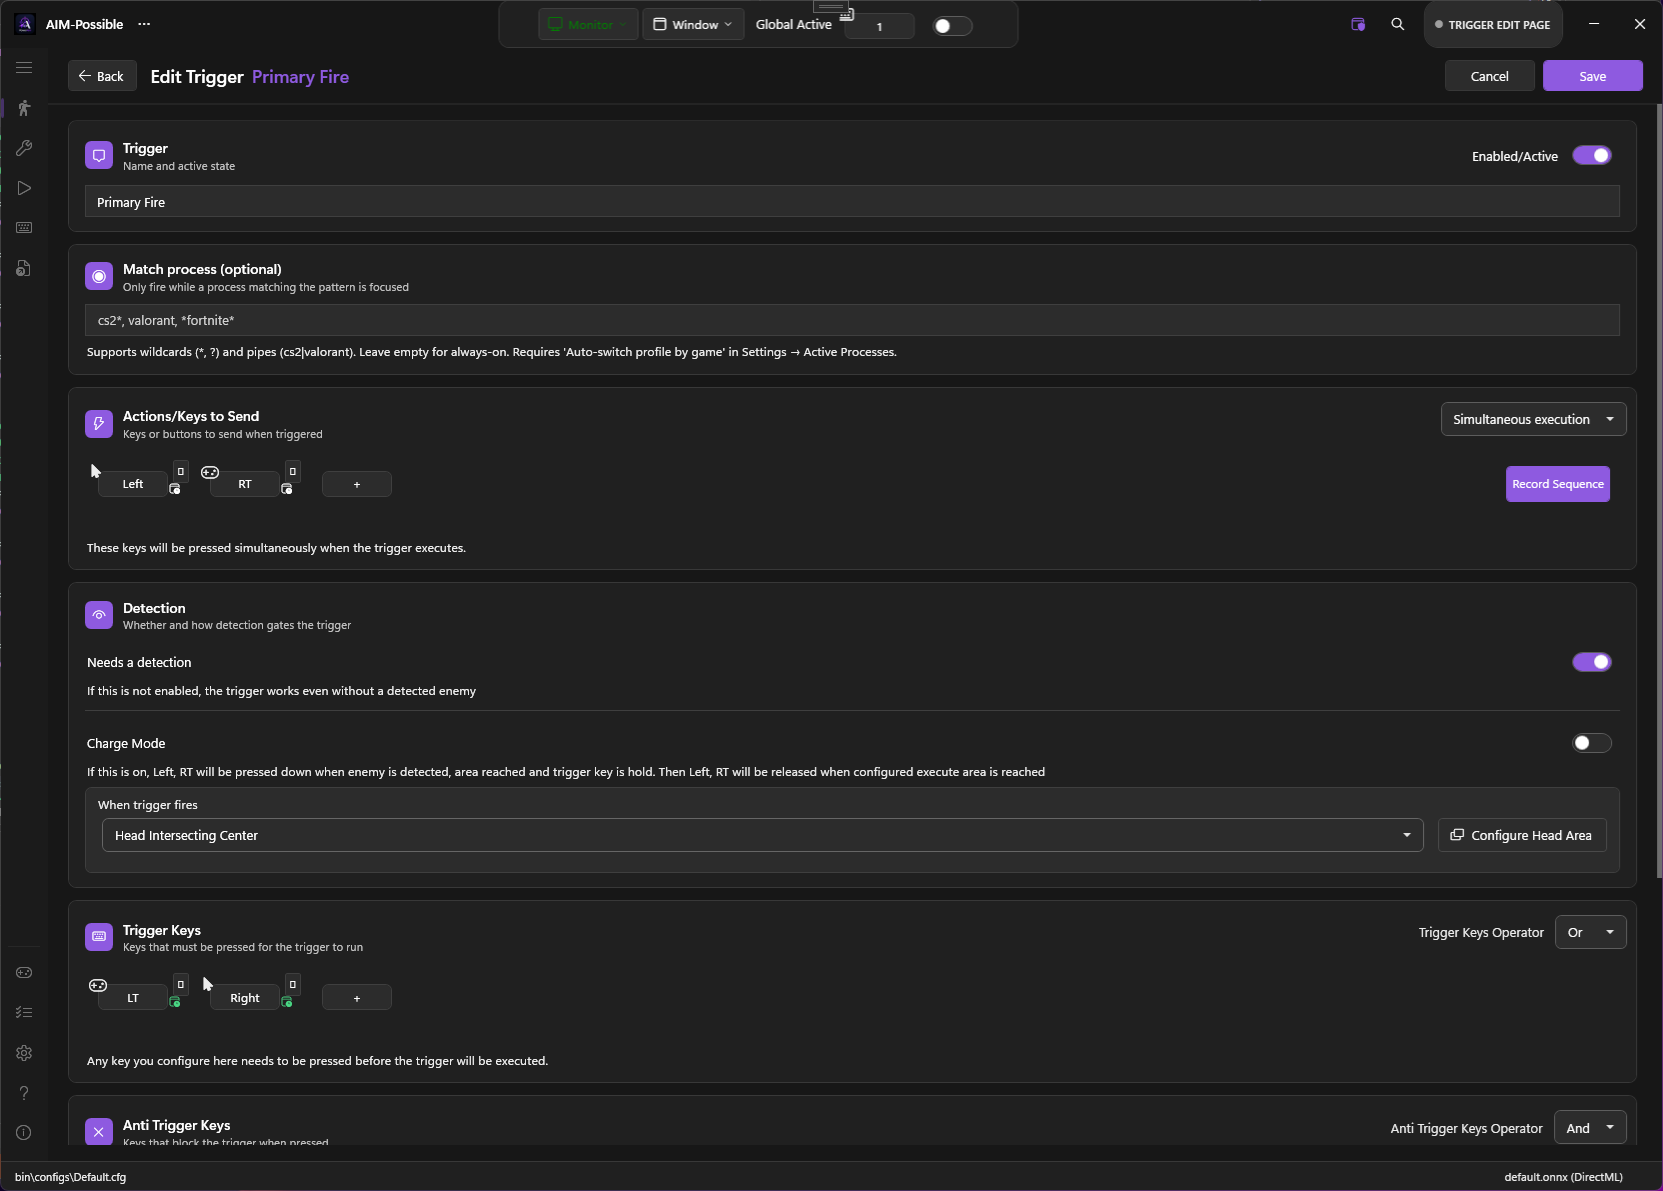
Identification
- Name — free text, shown in the trigger list and in the active-trigger status line
- Enabled — master switch for this trigger
- Match Process — optional process-name pattern. When set, this trigger only activates while the matching process is in the foreground. Supports wildcards (
*,?) and pipes (cs2|valorant). See Per-game profiles.
Trigger keys
- Trigger Keys — keys/buttons that must be held for the trigger to fire. Can be any mix of keyboard keys, mouse buttons, gamepad buttons, and gamepad triggers (LT / RT).
- Trigger Keys Operator —
AND(all keys held) orOR(any key held). - Anti-Trigger Keys — keys that block firing while held (e.g.
Rso you don’t fire mid-reload). - Anti-Trigger Keys Operator —
AND/ORfor the anti-keys, same semantics.
Actions
The list of inputs the trigger sends when it fires. Mix any of:
- Keyboard keys (
Keys.Space, etc.) - Mouse buttons (
MouseButtons.Left) - Gamepad buttons (
GamepadButton.A) - Gamepad sliders (
GamepadSlider.RightTrigger)
Execution Mode:
- Sequential — fire actions one after another, with
FirePressDelaybetween them - Simultaneous — fire all actions at once (default)
Intersection checks
Triggers can require the detected target to intersect the screen center in a specific way. Two checks are evaluated:
| Check | Meaning |
|---|---|
None |
No spatial requirement — fires purely on the key check |
IntersectingCenter |
The full detection box must include the screen center |
HeadIntersectingCenter |
The head sub-region of the detection box must include the screen center |
For HeadIntersectingCenter, you also pick a sub-rectangle of the bounding box (the “head area”). The editor has a live preview showing where that sub-rectangle is relative to the detected player.
Charge mode
When Charge Mode is on, the trigger has two intersection checks:
- Begin Intersection Check — when satisfied, the trigger starts holding the action (e.g. starts holding LMB to pre-aim).
- Execution Intersection Check — when satisfied, the trigger completes (releases the action).
Use case: hold LMB while the enemy is in your wider FOV, then release the click exactly when their head crosses the center.
Timing
- Delay — wait this long after the keys/intersection are satisfied before firing (seconds).
- Break Time — minimum wait between consecutive fires (seconds). Used to throttle rapid-fire actions.
Needs detection
If Needs Detection is off, the trigger fires purely on the key state — useful for binding macros without a target requirement (e.g. “Press G + delay 500 ms + press LMB” = grenade-cook macro).
OCR conditions
A trigger can be gated on a live OCR region value, so it only fires while the HUD shows a particular state — for example, only fire while ammo is above 5, or only while health is at least 50.
In the editor, the OCR conditions (optional) section lists one row per condition. Each row picks a defined OCR region, a comparison operator, and a target value:
| Operator | Fires when the region… |
|---|---|
| Greater than | parses as a number greater than the value |
| Greater or equal | number ≥ the value |
| Less than | number < the value |
| Less or equal | number ≤ the value |
| Equals | matches the value (numeric, or trimmed case-insensitive text) |
| Not equal | does not match the value |
| Contains | text contains the value (case-insensitive) |
| Not contains | text does not contain the value |
The numeric comparisons require the region to read as a number; the text comparisons work on the raw recognized text. All listed conditions must hold for the trigger to fire.
OCR conditions are only enforced while the OCR engine is on (Settings → HUD OCR → Enable HUD OCR). If OCR is off, the conditions are ignored and the trigger behaves as if they weren’t set. You must define the OCR regions first — the names you give regions are what you select here.
Default profile
PowerAim ships a default Primary Fire trigger:
Name: Primary Fire
Trigger Keys: LeftTrigger OR RightMouseButton
Action: LeftMouseButton
Execution: HeadIntersectingCenter
Charge Mode: off
Tips
- Use Anti-Trigger Keys liberally. Adding
R, Tab, ScrollLockto every fire-trigger’s anti-keys saves you from accidental fires during reload / scoreboard / map view. - Charge Mode shines for sniper rifles. Set
BeginIntersectionCheck = IntersectingCenter,ExecutionIntersectionCheck = HeadIntersectingCenter. You pre-aim while the body enters the FOV, fire when the head crosses center. - Match Process lets you reuse one PowerAim install across games. Create one trigger per game with
MatchProcess = cs2.exe,valorant.exe, etc., and PowerAim only arms the trigger that matches the focused game. - Sequential execution + small Delay = scripted combo. Useful for grenade pulls or quick-switch macros.
Troubleshooting
- Trigger doesn’t fire at all — check the master AutoTrigger toggle, the Global Active master toggle, and the trigger’s own enabled state.
- Trigger fires too often — raise the Break Time slider.
- Trigger fires too late — lower the Delay slider, or lower
FirePressDelayon the Settings page. - Charge Mode releases too early — increase the size of the Execution Intersection Area.
- Trigger ignores my anti-key — verify the anti-key is actually a held key (not a one-shot press). The anti-key has to be
IsHoldingtrue at the moment of fire.